Actions Menu (Right Click Menu)
Actions menu is almost identical with the Right-click menu, and it is mostly similar to Edit menu, which was discussed earlier, with some more extra sub menus and functions.As we discuss the Actions menu we will also cover the Right-click menu at the same time. Only difference between the Actions and Right-click menu is the Schematics functions sub menu which is only available on the Right-click menu.

The Actions menu is a dynamic menu which will have available and unavailable elements depending on the selected component. In order to use it efficiently, the user should select a component before using the Actions menu, so, all the related commands/functions/sub menus will available specific for that component. If nothing is selected before accessing the Actions menu, then, only Insert Menu, and Cancel options will be available.
- Insert is discussed in detail in the following section. Please refer to Insert Menu section.
- Edit (shortcut F2) is used to access Circuit Edit module which will be discussed in Circuit Edit Module Tab section.
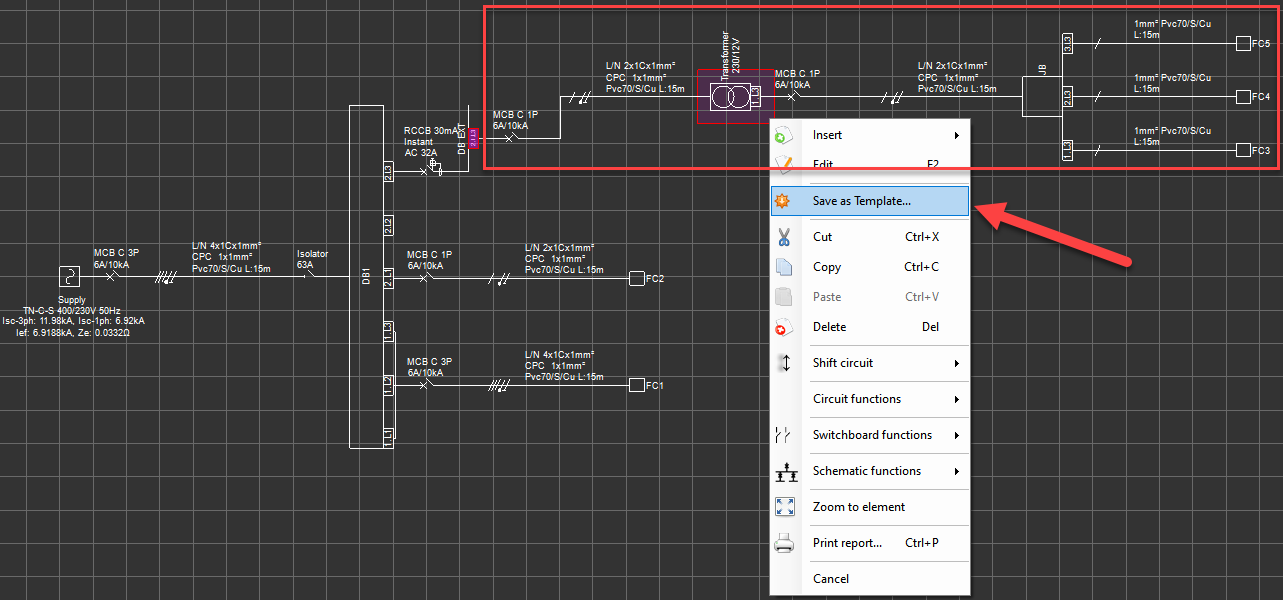
- Save as Template... is used to save a part of a design as a template, so it can be used anytime later on. Once a template is saved, it will be available regardless of which project is active. This menu element is a shortcut just to save a template, and full access to templates is accessed via the System Tree Section toolbar, see Templates. Once a part of the design is selected, either via Schematic module or System Tree section, Save as Template... will be available to select. As an example below, the part of the system after the transformer has been selected and saved as a template using the right-click menu.
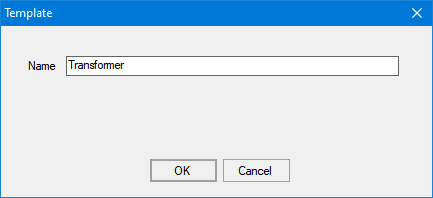
ElectrcialOM will display a window asking for a name for the selected part.
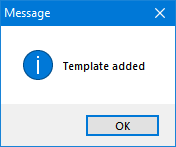
If the user clicks OK to save the part of the system as a template, then, ElectricalOM will notify the user with a pop up window.
Saved templates can be accessed by the Templates button on System Tree Section toolbar.
- Cut/Copy/Paste/Delete are all explained in section Edit Menu.
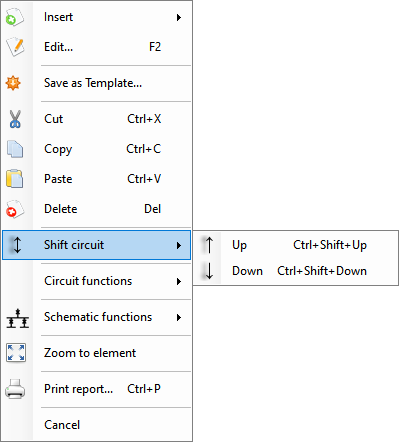
- Shift Circuit is used to move a circuit one way up/down or left/right depending on the orientation selected at Design Defaults tab under Project info and options... menu. Keyboard shortcuts are CTRL+SHIFT+Up for up (left) and CTRL+SHIFT+Down for down (right). In order to shift a circuit, the circuit needs to be selected via Schematic module or System Tree section before using this command.
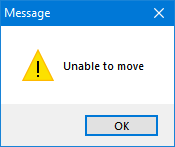
Shift action is a step-by-step action, which means the circuit selected will be moved one step at a time, so, if there is another circuit next to the circuit meant to be shifted, then, the ElectricalOM will warn the user with a message window. If a circuit is needed to be moved to a location where there are other circuits on the way, Cut/Paste commands are a better option to move the circuit to the desired location rather that Shift Circuit.
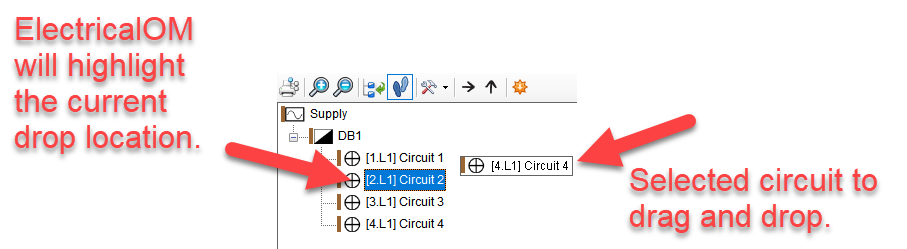
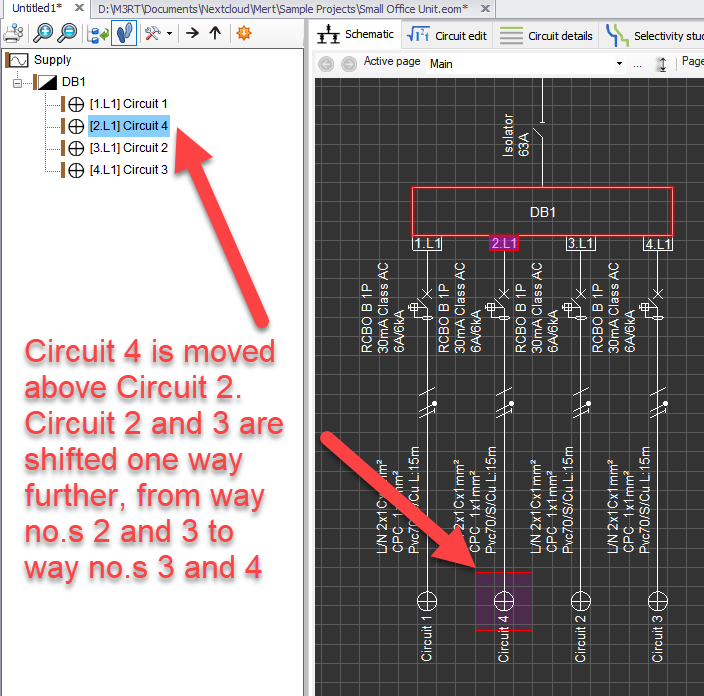
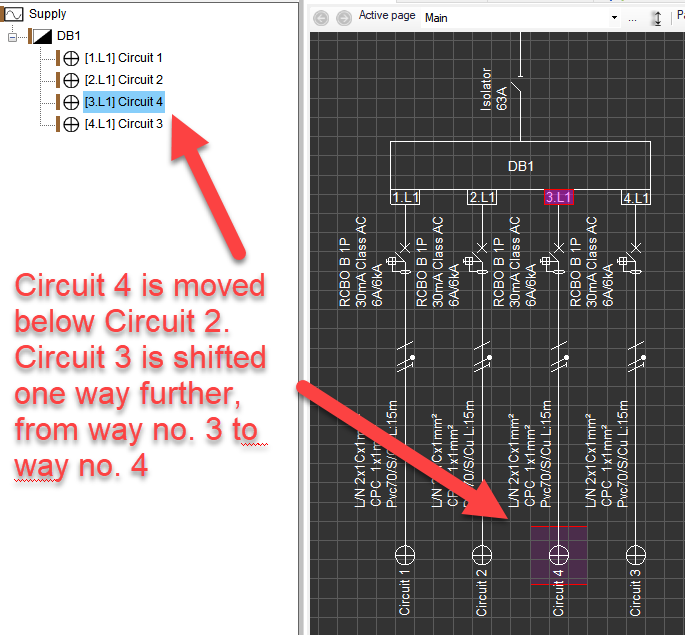
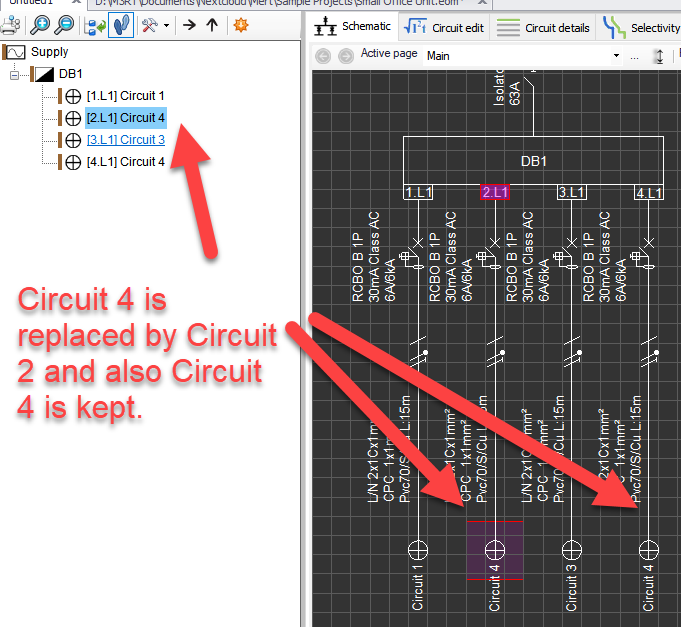
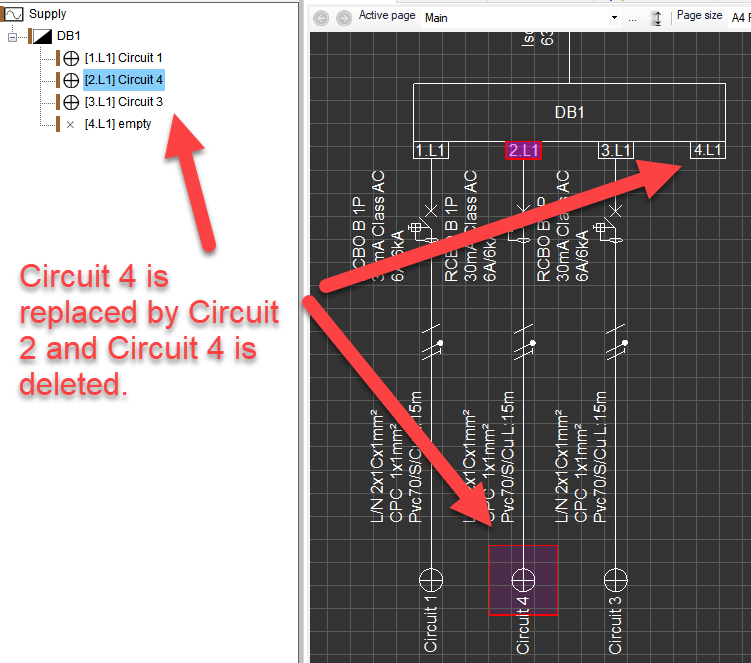
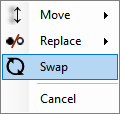
Drag and drop feature is also an option in these circumstances. First, a circuits must be selected, and then the user may drag the circuit to a desired position by use of the left mouse button. While dragging the left mouse button must be depressed. When the circuit is at the desired location, the user must release the left mouse button which at this point a menu will be displayed, Drag and Drop Menu. Drag and drop menu has three options:
- Move: This will move the selected circuit to above or below of the drop location and shift the other circuits forwards.
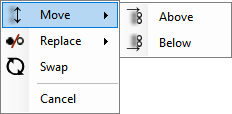
- Replace: This will move the selected circuit to the drop location and keep or delete the selected circuit. In any case, the circuit at the drop location will be deleted.

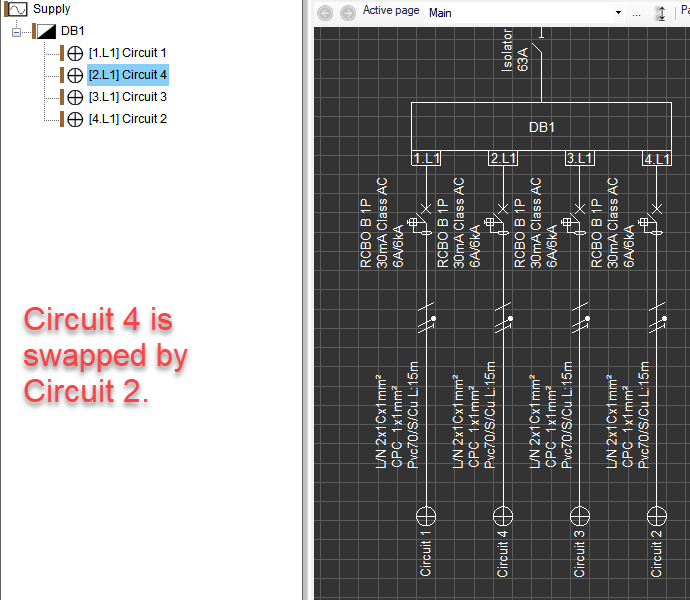
- Swap: This will swap the selected circuit and the circuit at the drop location.
- Circuit functions is explained in section Circuit Functions.
- Switch board functions is explained in section Switch Board functions.
- Schematic functions is explained in section Schematic Functions.
- Zoom to element is a command to centre the Schematic module's drawing area to the selected object. It is specially designed to be used on System Tree area where the user can click on an object and centre the screen to the selected object. As default, Zoom to selection option is set to on and Zoom to element command is not necessary, but if the Zoom to selection option is turned off, Zoom to element proves itself a very practical command. Zoom to selection option is discussed separately in System Tree Section.
- Print report will generate the report only for selected item. Reports are discussed in Reports Modules Tab section.
- Cancel option will close the Actions menu.