Predefined Frame Section - Frame Builder
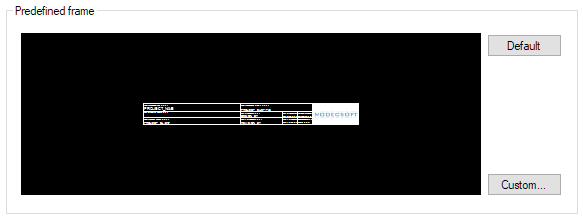
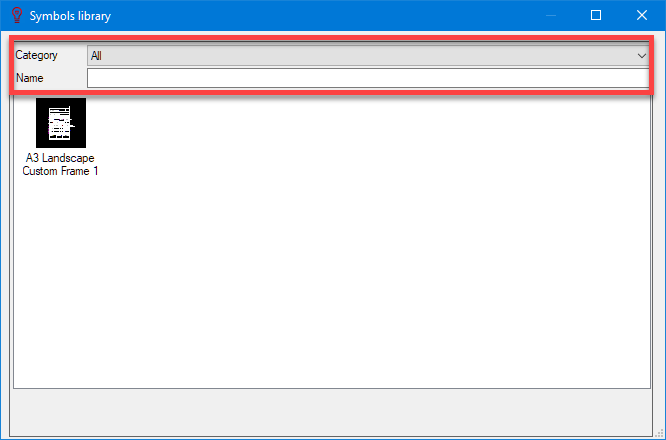
ElectricalOM allows users to create and use custom frames for projects. In order to select a frame other than the default ElectricalOM frame, Custom... button is used. When the user clicks on the Custom... button, ElectricalOM will display the Custom Frame Library where all the custom frames are listed. The user may filter the results using the Category drop-down list or the Name text field. Once a frame is selected, the window can be closed using the X located at the upper right corner, there is no OK button.
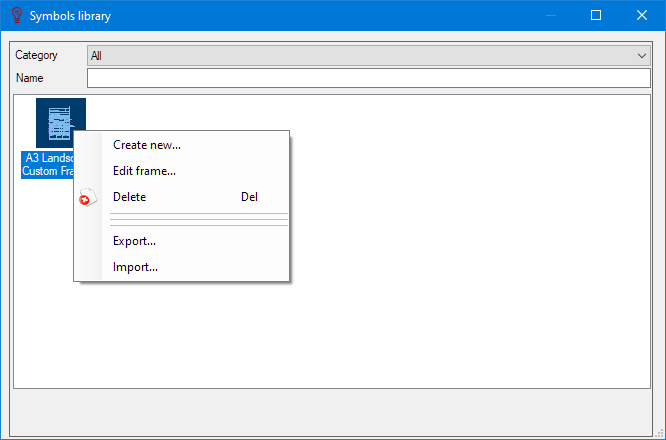
The user can also create new frames, edit existing frames, and delete existing frames using the right-click menu within Custom Frame Library. Please see below for details.
It is important to understand that if the user sets a frame within Project and info options... menu, the selected frame will be applied to all projects as default frame. however current project will not be affected. If the user wants to set a frame for a specific page only, then, Page details button on Schematic Module toolbar must be used instead.
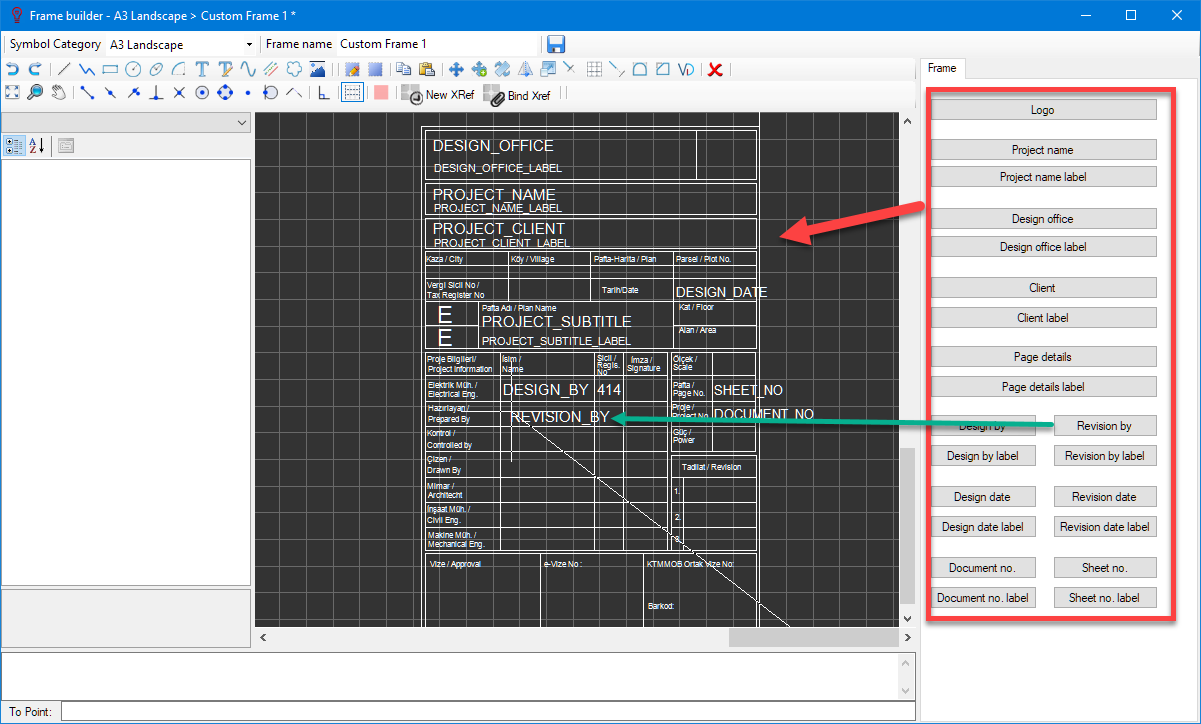
ElectricalOM's built-in facility to create a custom frame is called Frame Builder. Frame Builder can be accessed via a right-click menu within the Custom Frame Library selection area. Create new... and Edit frame... will both initiate the Frame Builder, the former opening a blank template and the latter opening the selected frame in the drawing area. In terms of behaviour and format, the Frame Builder is mostly the same as the Symbols Builder, so for detailed information please refer to Creating and Editing a Symbol section.
On the other hand, there are a few differences:
- the Frame Builder has a right panel with predefined attributes which can be places on the frame which will pick up data from various locations to fill in the frame info. , and,
- the drawing area of the Frame Builder will have a rectangle representing the selected page size border. This is not the frame border.
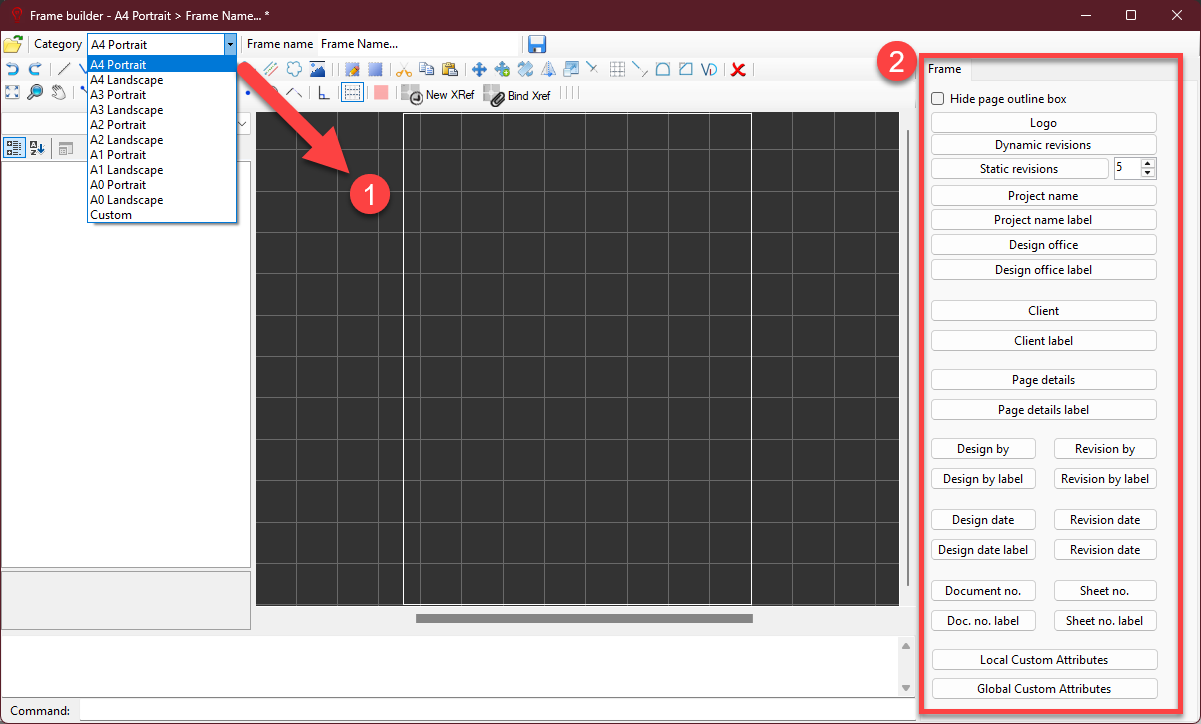
Once the Frame Builder is initiated, the user may start working on the frame by using the toolbars. Top toolbar has a few drop-down lists:
- Open button will open the frame library, so, user can open an existing frame and work on it.
- Category list is where the size and orientation of the page is selected.
- Frame Name is a text field where user can define a name for this frame.
- Save button will save the frame to the frame library.
Other toolbars are already discussed in Symbol Builder.
Once the structure of the frame is completed, attributes can be used to pick up data from various locations automatically. This is done via right hand side panel by selecting attributes by clicking on buttons and placing them to desired locations. As a reminder, buttons names as labels are just text and will be displayed as they are, there is no data collection for labels. Once the frame is saved and placed on a project, attributes will be populated using user's entries at various fields, mainly at Project info and Page details windows.
Apart from built-in attributes, users can also create their own attributes. There are two types of attributes can be created.
- Local Attributes: These are used only on the active page. For detailed information about local attributes, please refer to Creating custom frames for pages
- Global Attributes: These will be available for each page of the project. In order to create a global attribute, Custom Attributes option must be used, see Project info Tab for details. After a global attribute is created, they will be visible on the attributes list which can be accessed by clicking in Global Attributes button.
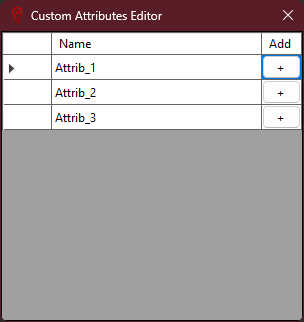
Using the + button, user can insert this attribute to any location on the drawing area. This is the label for attribute. Once the frame is generated, user defined attribute value will be displayed at that location.