Creating multiple sheets and Setting a Custom Page Size
Creating multiple sheets
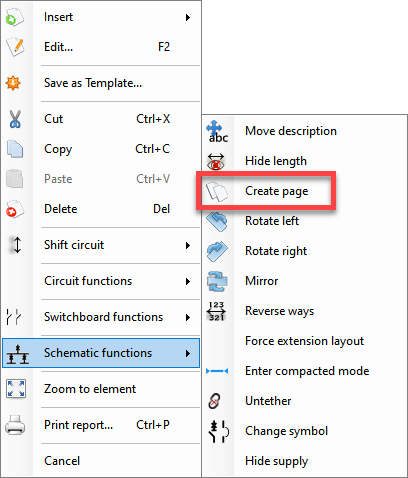
ElectricalOM lets the user to create multiple sheets and move parts of the design to these sheets. It is essential to know that each sheet has to have a distribution node associated with it, otherwise ElectrcialOM will not make this option available to the user. So, to create a new sheet, Create page option is used which is available at the Schematic Function menu.
ElectricalOM will move the selected distribution node to a new sheet once the Create page is selected. If the user wants to move the distribution node back to the original sheet, the intended distribution node needs to be selected prior to accessing to the Schematic functions menu. This time ElectricalOM will display a Restore page option instead of Create page. If Restore page is clicked then the selected distribution node will be moved back to its original sheet and the sheet previously created to accommodate the distribution node will be removed.
Navigation between the sheets is available in two ways: history recall buttons and Active page drop down list.
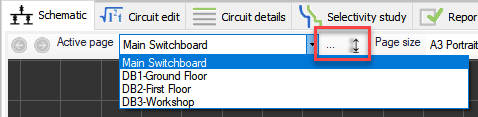
- History recall buttons will let the user to navigate the doc set in the order of the sheets are accessed by the user. So, a sheet viewed by the user before the active sheet will be displayed once the reverse arrow button is clicked, for example. Originally they are greyed out, but as soon as the user navigates to a sheet other than the sheet which has the active source on it, they become available.
- The Active page list is the primary way of navigation through the doc set. User can navigate any of the sheets displayed on the list by clicking on the name of the sheet.
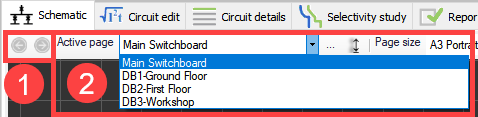
There are also two more option that can be used to modify the doc set. One is the Page details button which is represented by three dots and the other one is the Reorder pages button which is represented by a vertical two way arrow.
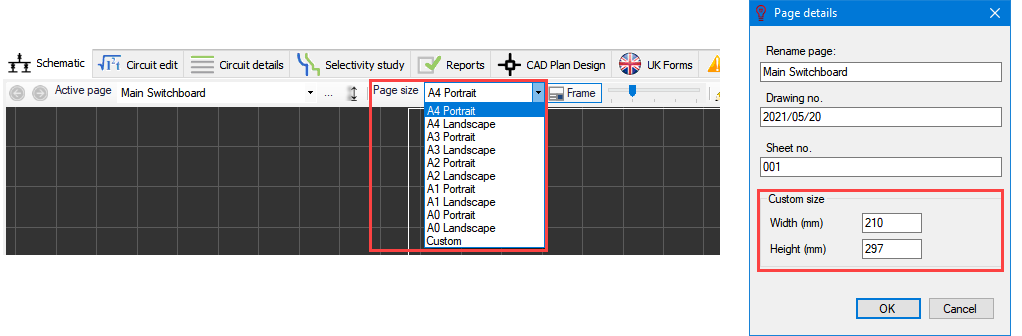
Page details button will display a window where the user can define a name, a drawing number, a sheet number, a custom page size, and a frame for the active sheet. The frame selected in this window will affect the active page only. OK button must be clicked to save changes.
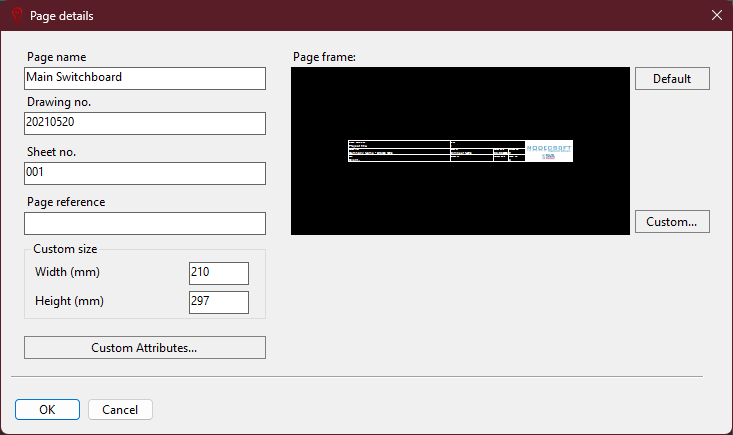
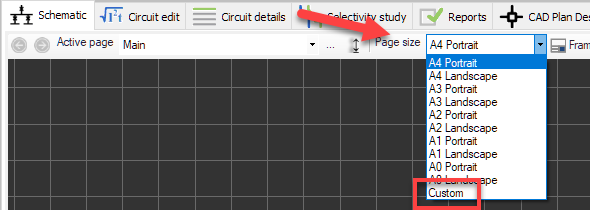
Custom size option lets the user to define a custom page size for the active page, and it is only applied if the user selects Custom option from the Page size list, otherwise it does not have any effect.
Local Custom Attributes option lets users to create attributes which are specific to active page only unlike Global Custom Attributes. Global Custom Attributes are not accessible from this menu. Usage is the same as global custom attributes except these cannot be added to reports. Once a local custom attribute is created, they can be found in frame builder when accessed from this menu. Refer to Frame Builder.
Page frame section, which is located on the right hand side of the window, lets the user to define a frame for the current page, see Enabling The Frame. Default button sets the default ElectricalOM frame as active but the user may wish to select a custom frame using the Custom... button which will initiate the Custom Frame Library. For further details about custom frames, please refer to Predefined Frame Section.
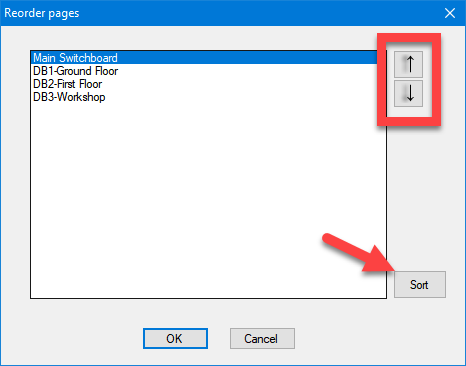
Reorder pages button will call the Reorder pages menu. User can rearrange the order of the sheets using the up and down arrows on the right hand size. In order to move a sheet up or down, the sheet in interest must be selected before using up or down buttons, this will be indicated by highlighting the sheet's name with blue by ElectricalOM. The sheets can also be arranged in alphabetical order using the Sort button. OK button must be clicked to save changes.
Setting a custom page size
A page size can be selected using thePage size drop down list. ElectricalOM provides standard sizes of A0, A1, A2, A3, and A4 with landscape and portrait orientation options as well as a custom option which the used can define a custom size. Defining a custom size is discussed above.