Part 1 - Board settings

- Select from schematic button: This button will navigate to the circuit which is already selected on the tree network. A circuit can also be selected from the Schematic module which will cause the same circuit to be selected on the network tree. Remember, the circuit must be selected before this button is clicked.
- Locate in schematic button: This is similar to the Select from schematic button but works the other way around. First. you select a circuit from the circuits list of UK Forms and click on this button. ElectricalOM will select the same circuit on the tree network which also selects the circuit on the schematic.
- Remove association/Associate with the design network button: This button will break the link/create a link between the active board and the ElectricalOM project. Once the link is broken, UK Forms data will be editable by the user, however, none of the changes to this data will be reflected back to the ElectricalOM project, because Lock Design button (See Part 3) will not be available. If a link is created, then the option to synchronise UK Forms and ElectricalOM project (Lock Design button) will be available. Creating a link requires a board to be selected from the tree network/schematic.
- Boards drop-down list: This is a drop-down list of all the boards existing on the UK Forms data. The board needs not to be on ElectricalOM project to be displayed on this list. You can see both the prefix and the description of the board. There are also some parameters in brackets give some useful information about the boards:
- Non-referenced: A board with no association to ElectricalOM project
- Draft/Under review/Completed: A board with these statutes.
- M: Source component
- Exc: Excluded from report/certificate
- On/Off: An online/offline board.
- Obs: X: There X number of observations associated with the board
- 1Ph/3Ph: A single-/three-phase board
- Status drop-down list: This list is used to mark a board as draft, under review, or completed.
- Sort based on status button: This is a toggle button which orders the boards depending on their status in the order of Completed, Under review, Draft, Non-referenced if it is activated. A blue rectangle will indicate if this button is active.
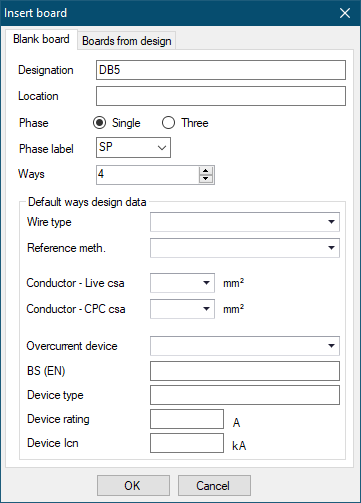
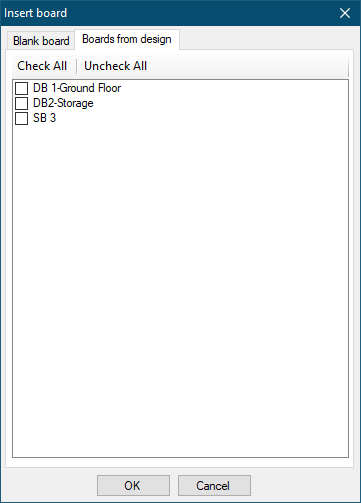
- Insert board button: This button will insert a board into the UK Forms data. There are two options inserting a board.
- Blank board: This will directly insert a board into UK Forms. The parameters can be set using the Insert board screen. The inserted board will be marked as non-referenced and will not posses a link to ElectricalOM project. Once all relative data is filled in, OK button will insert the board to the report and display the final circuits on the Circuit Details and Test Results list. The board inserted with this method will not be added to lectrcialOM project.
- Boards from design: This will present a list of boards available with ElectricalOM project so you can select boards to insert into UK Forms. Boards inserted using this method will automatically be added as linked boards.
- Board Details button: This will bring up the DB Details screen where you can fill in any additional data for the active DB. The fields will be partly filled in, however, most of the data requires either a manual filling exercise; or usage of Fill from design or Fill tests from submitted tests button. As usual, ... buttons indicate access to database where related fields can be filled in using existing data.

- Load settings defaults button will apply default devices for appropriate fields, see Creating Test Devices for details about devices.
- Apply to all DBs button will apply the test instrument details to all boards.
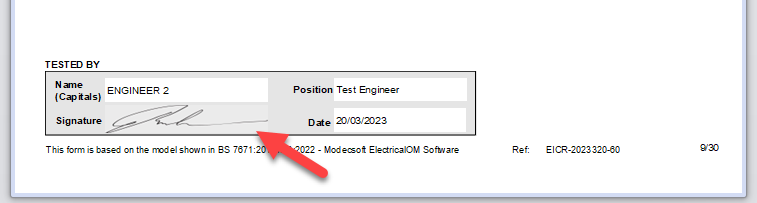
- Signature tick box will insert the signature image to certificates. Sometimes when you add or edit a signature image, UK Forms does not display the new or updated image. Please click on ... button and select the same engineer so UK Forms is forced to update the image file.
- Apply test date to all DBs button will set the same date to all boards.
- Apply test engineer to all DBs will set the same engineer data to all boards.
- Board Images button: This button will initiate a new window where you can define two separate pictures for the active board. There are two sets of buttons for each picture. Select... will display a browser windows where you can choose a file for the board. Rotate button will rotate the picture as you click.
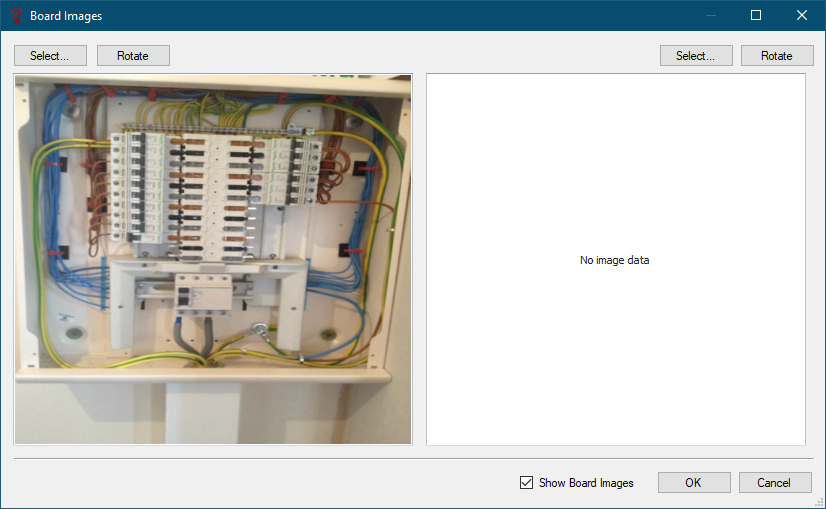
Show picture tick box will place the picture(s) on the certificate.
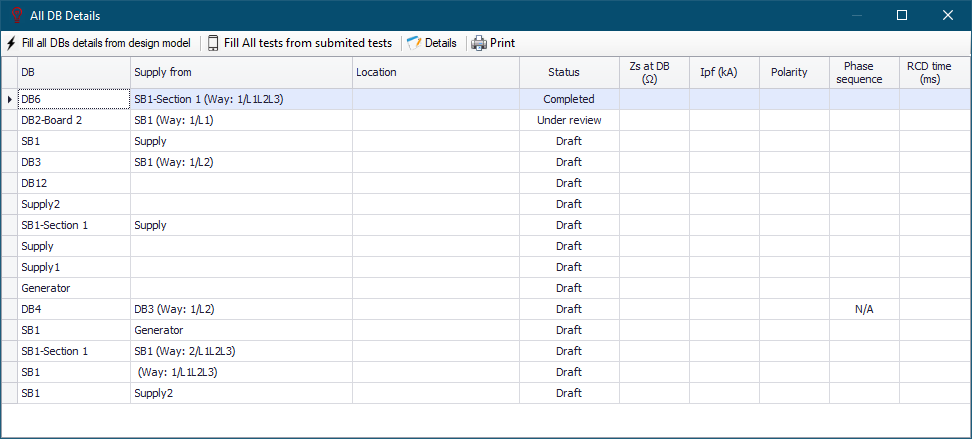
- All Board Details button: This will display All DB Details window which is structured as a list. All fields are editable by the user, however, none of the changes will be applied to ElectricalOM project but will exist only on UK Forms and certificates.
- Once again, Fill all DB details from design model button and Fill All tests from submitted tests buttons can be used to fill in the fields.
- For Details button see Board Details button above.
- Print button will display a print preview window.
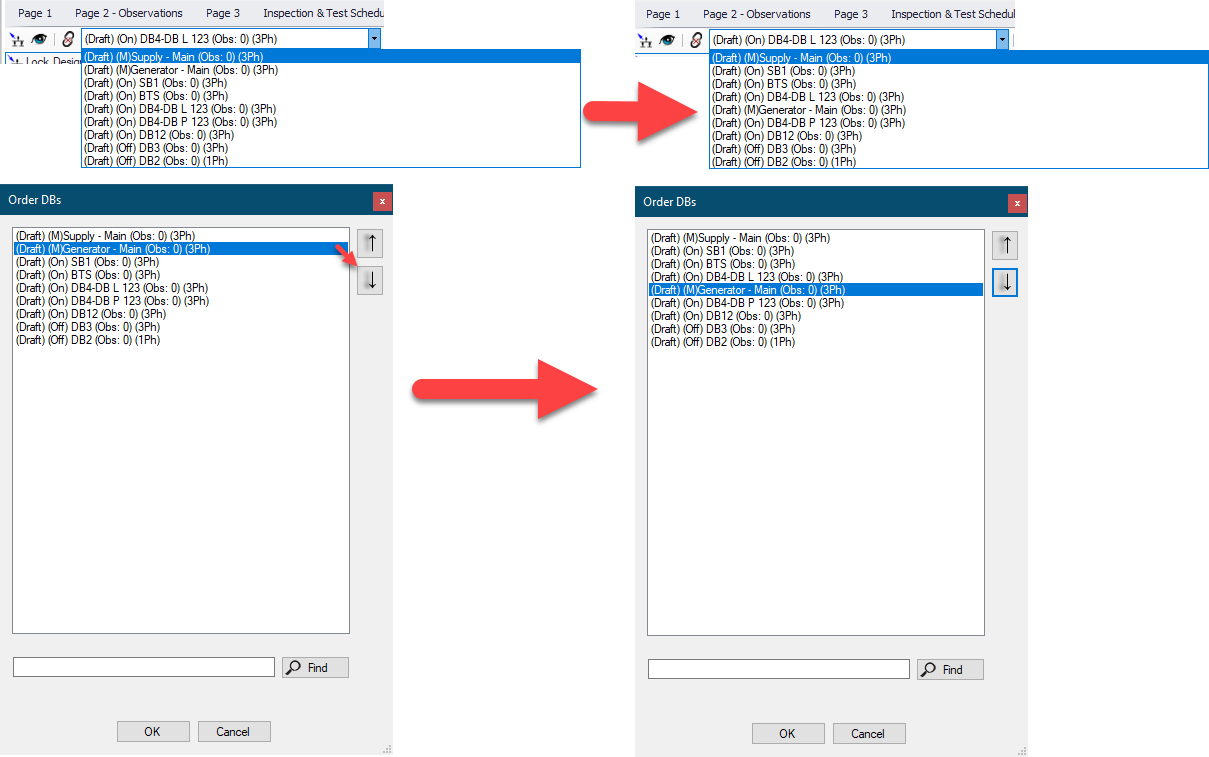
- Order button: This button allows you to reorder the boards. When you click on the button, list of all boards will be displayed where you can select a board and use up or down buttons to move it within the list. Changes will be reflected as soon as you click on OK button at boards drop-down list.
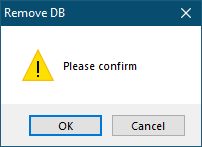
- Remove board button: This button will remove the active board from UK Forms.