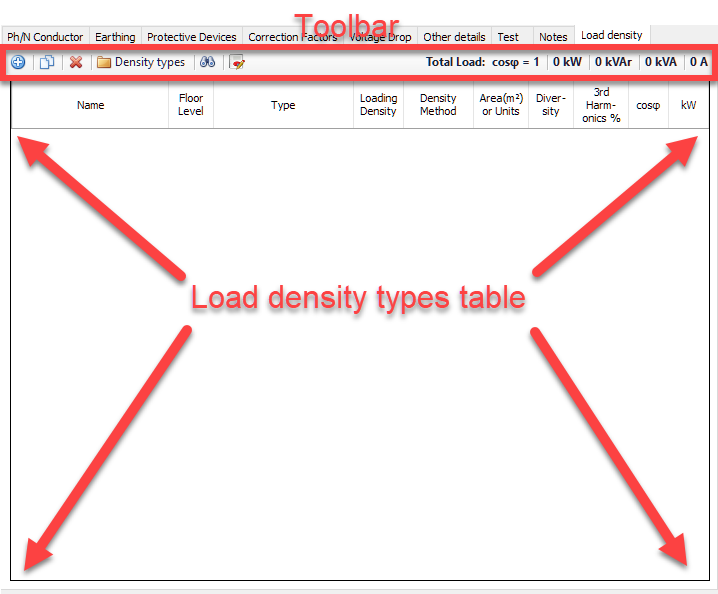
Load density Tab
Load densitiy tab is only available for distribution nodes. Load densities are used to predict load of a distribution circuit. It is generally used for early design stage where the actual load is not known but a preliminary design is needed. ElectccialOM allow the user to assign load densities gathered from various bodies like BRSIA, or BCO, or etc. Load density tab consists of a toolbar at the top and a load density table below it.
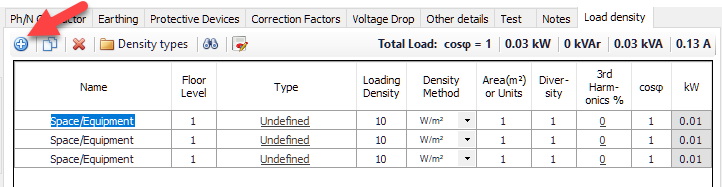
- Add button is used to add a load density row to the table. Each time this button is clicked, a new row will be added to the table.
The user can rename the load by clicking inside the Name cell and typing in. Floor Level can also be modified similarly. Type cell is used to assign a predefined load density type from the Load Density Types list. When the user clicks on the load density type, which appears as a link, Load Density Types window will be displayed. The System Types tree can be expanded to see various load density folders which are based on documentation of indicated bodies.Each folder can be further expanded by using the + boxes.
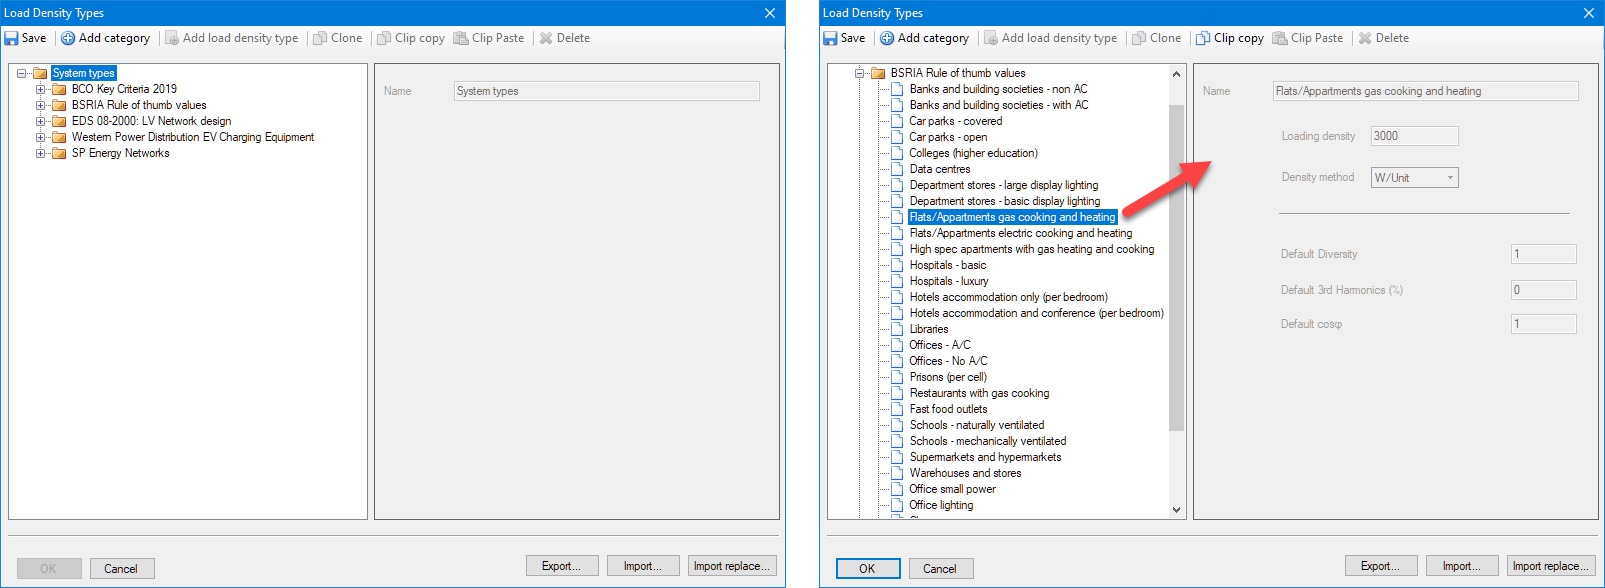
Once an appropriate load density type is clicked on, related data will be displayed on the right hand side. The selected type can be assigned to the active row by clicking on OK button.
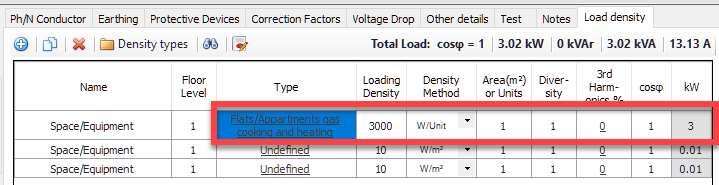
Load density value can still be modified by the user by clicking inside the cell and typing in the required value. This is a unit value and total load will be calculated using the remaining cells and will be displayed in kW cell. Density Method can be changed by means of the drop-down list. It has two options as W/Unit or W/m2.
It is possible to add multiple rows and assign different load types for each row which is useful while estimating a load value for a distribution load which is planned to feed multiple areas.
- Copy button will copy the selected row. The new row will be created at the bottom of the table.
- Delete button will delete the selected row.
- Density Types will display the Load Density Types window. Selecting any item will not have any effect on the table.
- Find button works with Revit. Please refer to Revit Menu for details.
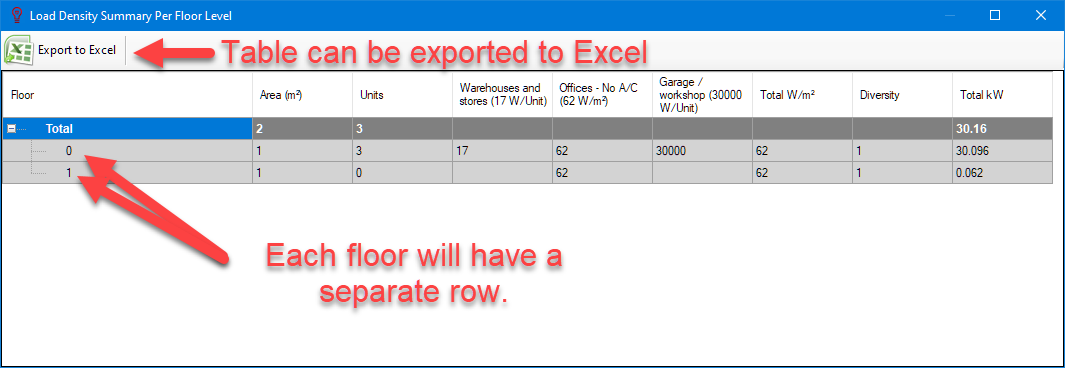
- Summary report button will display the Load Density Summary Per Floor Level window. This will include all load densities within the project and will create a separate row for each floor level. This table can also be exported to Excel by using Export to Excel button.
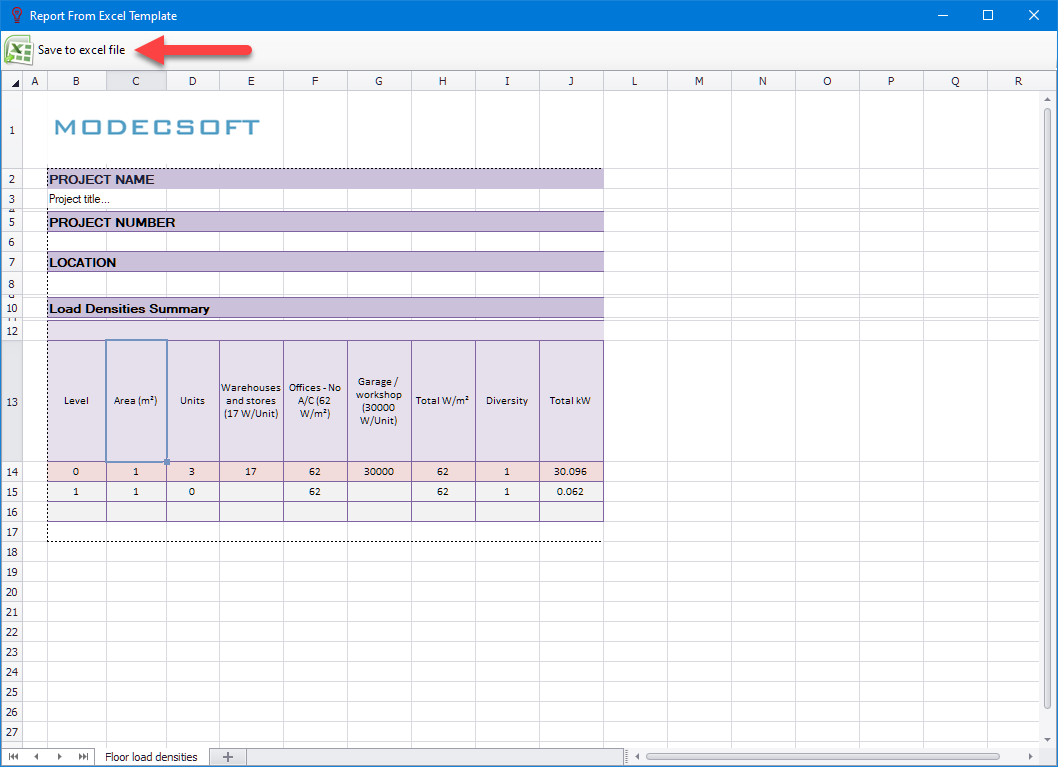
Export to Excel button will initiate ElectricalOM's Excel interface. The created spreadsheet can be saved as Excel file by clicking on Save to excel file button.
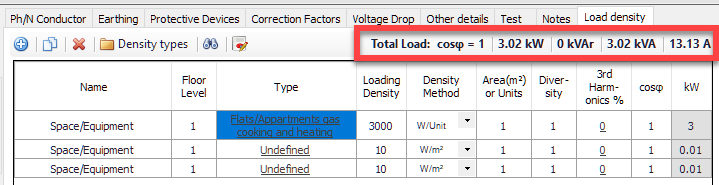
- Total Load data will be displayed on the right hand side for the selected distribution circuit.
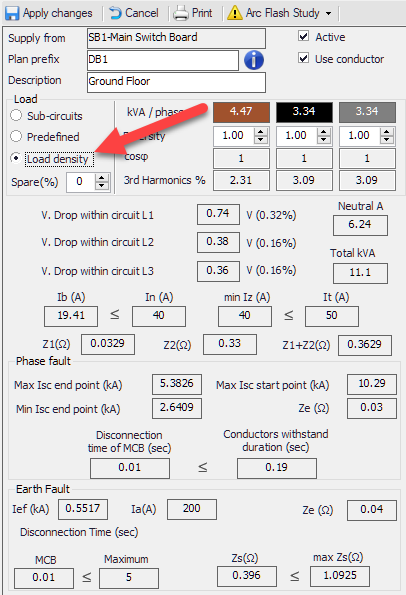
The most important part to use the load densities is to enable the usage of load densities for ElectrcialOM calculations. In order to use load density values for calculations, the user must select Load density option from the Load selection of Definitions section. Without selecting this option. ElectricalOM will ignore the load density settings.