Creating New Certificates and Loading Existing Ones
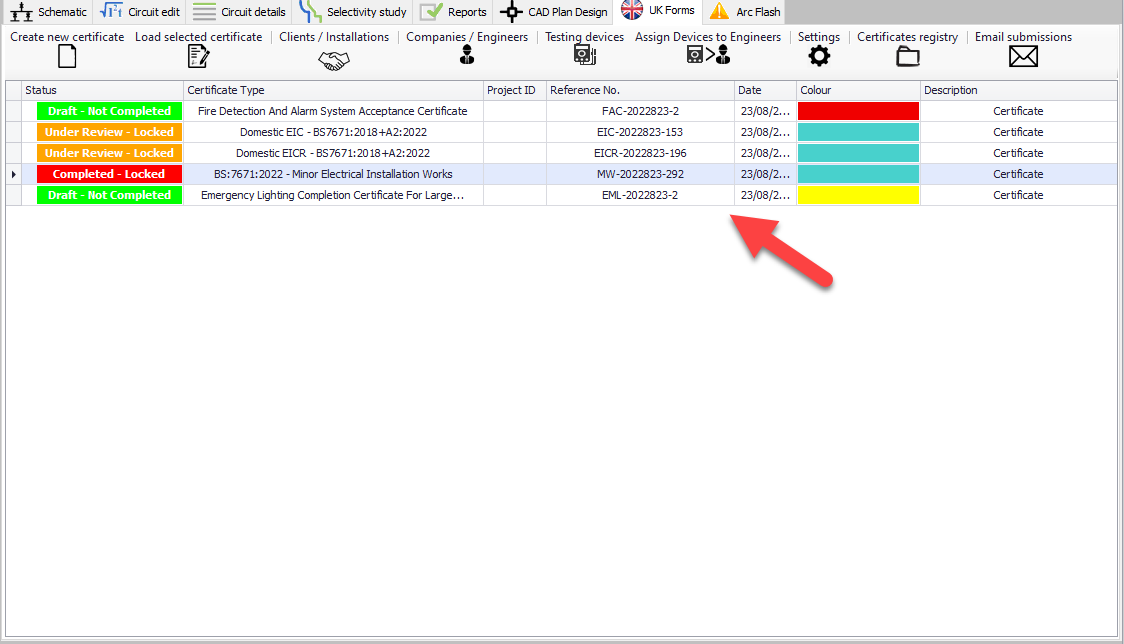
Now that we learnt how to create our database, we can look at creating new certificates. Buttons on the main toolbar shown below are associated with certificate actions.
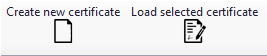
Creating new certificates with UK Forms add-on module is an easy process. First step is to click on Create new certificate button or use the right-click menu on certificates list. This will bring up the New certificate window which has a list of all available certificates on the left hand side. For a list of available documents, please refer to Available Certificates.
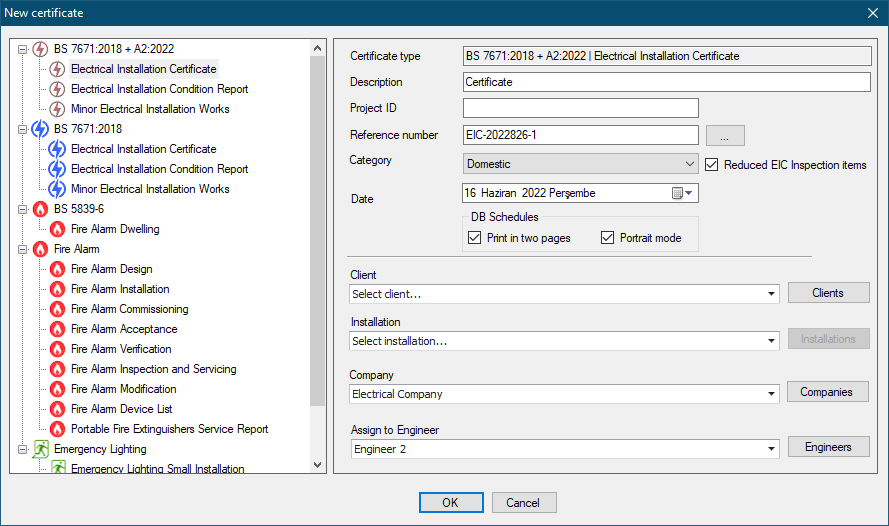
After selecting an appropriate certificate, it is time to fill in the required fields on the right hand side. The text fields are mostly the same for all of the certificates.
- Certificate type will be filled in automatically by UK Forms depending on the selected certificate.
- Description field is filled in as Certificate by default but it can be modified as per user requirements. You may like to change it to Condition Report if you are creating an EICR.
- Project ID field can be used to identify the project if there is a identification scheme.
- Reference number is the reference number of the document being created and it is filled in by UK Forms automatically. It can be overridden manually by clicking inside the text field. Three dots button will display Certificate Numbering window, for details refer to Numbering Tab.
- Category field is only available for EIC and EICR. There are two options, Domestic and Commercial/Industrial, which will affect the sections within a certificate.
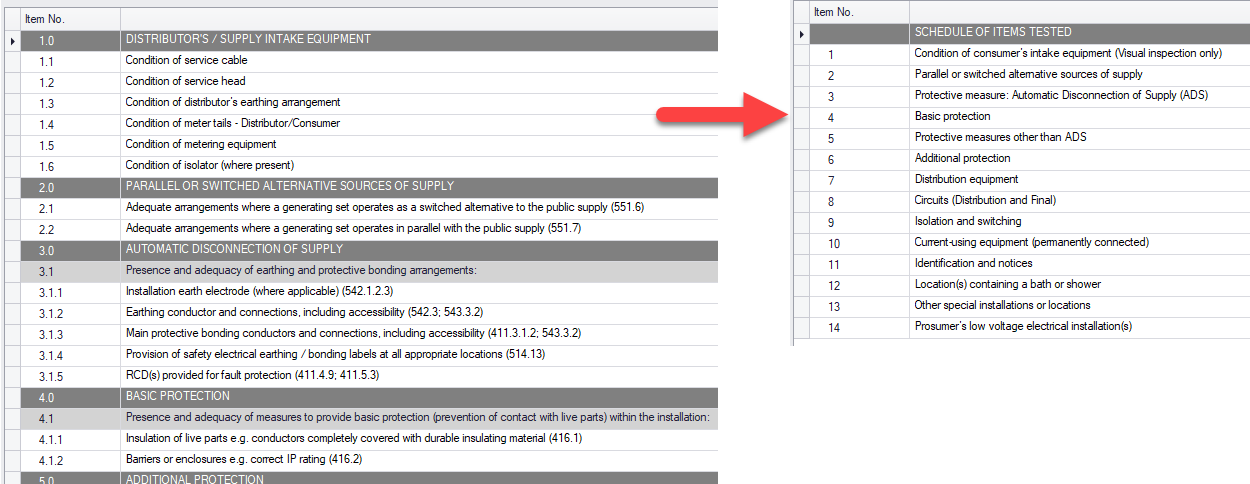
- Reduced EIC Inspection Items option will appear only if a BS7671 Amendment 2 version of EIC is selected. It will remove the subordinate items from the list of inspections.
- Date field is used to set a creation date for the document. Drop-down menu will display a calendar, so a date can be picked easily.
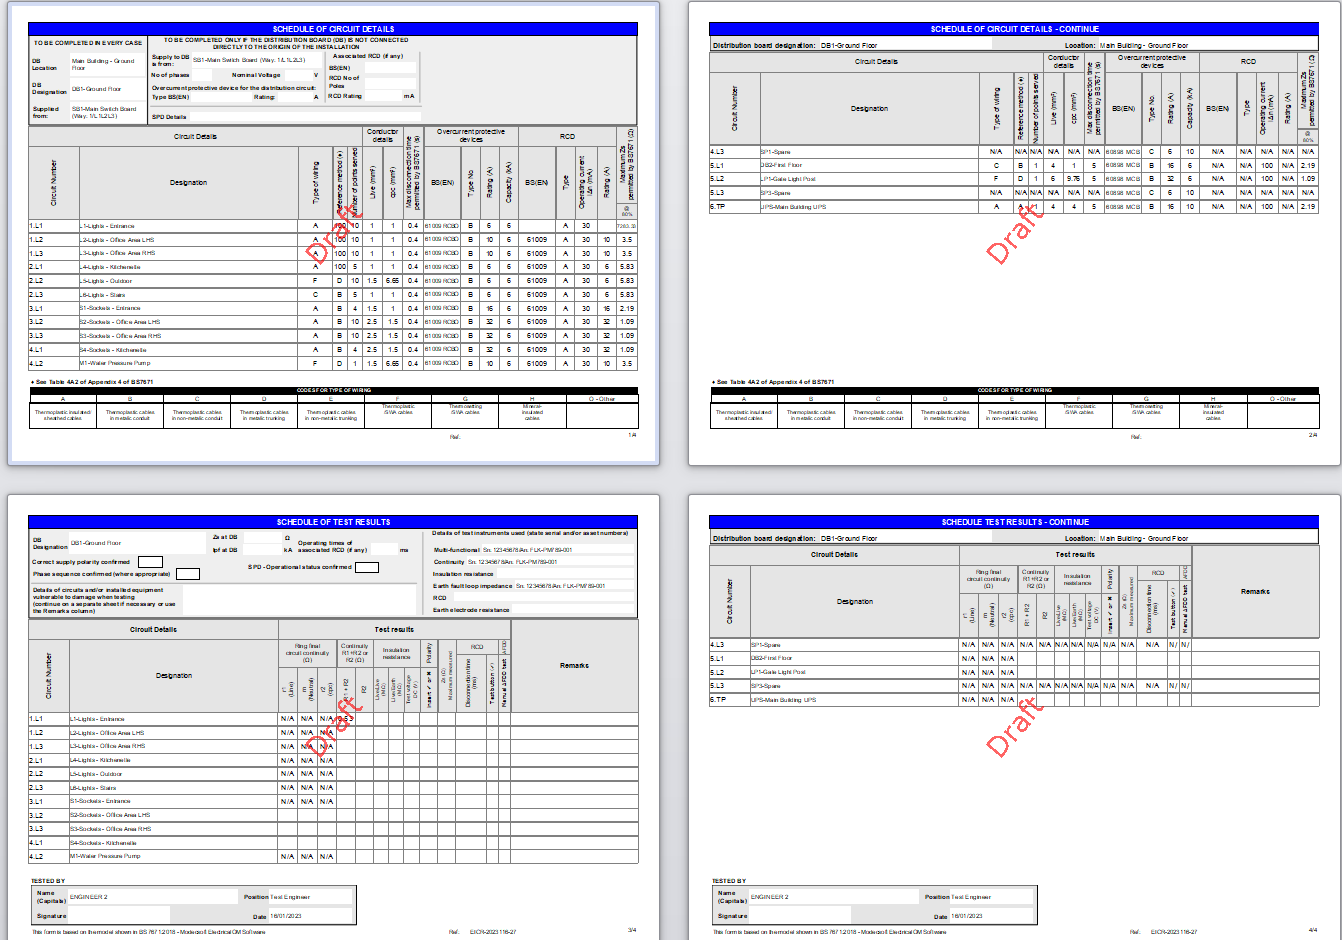
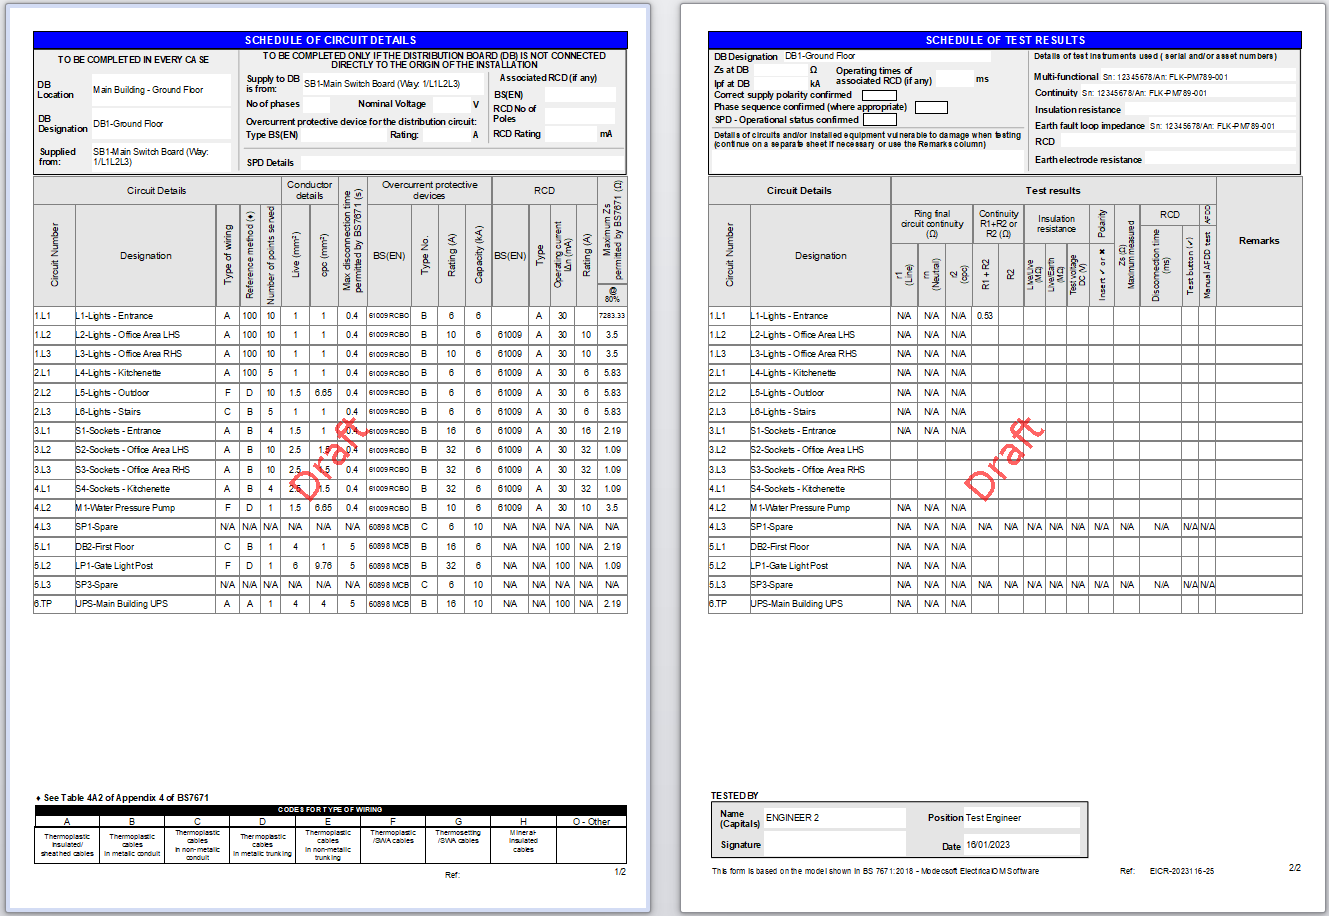
- DB Schedules section is only available for BS7671 Amendment 2 versions of EIC and EICR. This section will tell UK Forms how you want it to print the Distribution Boards tab data.
- Print in two pages and Portrait mode options will print Distribution Boards' details split into two pages, one for circuit details and one for test results, either in portrait or landscape mode. Below, you see the same circuit schedule of the same board printed in two pages in landscape (first) and portrait (second) modes.
- Client/Installation/Company/Assign to Engineer fields are drop-down lists where appropriate records can be selected from the database. They each have a button on the right hand side so the user may access to the corresponding data set. Refer to Creating a Database for further details.
OK button at the bottom will create the document and add it to the Certificates list as the last item.
If the certificate is created on a file where an already modelled system exists, all data on certificate will be pre-populated. Exception to this are the pages contain data about persons and/or companies, signatures, supply characteristics, particulars of installation etc.
Loading an existing certificate is as easy as creating one. All you need to do is to select the certificate you want to load and click on Load selected certificate button. It is also possible to double-click on a certificate form the certificates list or using the right-click menu for the selected certificate.