Switchboard Coupling
Coupler sections can also be added to switchboards by help of the Install couple section after and Install couple section before options of Switchboard functions menu. In order to add a coupler section, a switchboard must be selected, and one of the options can be applied.
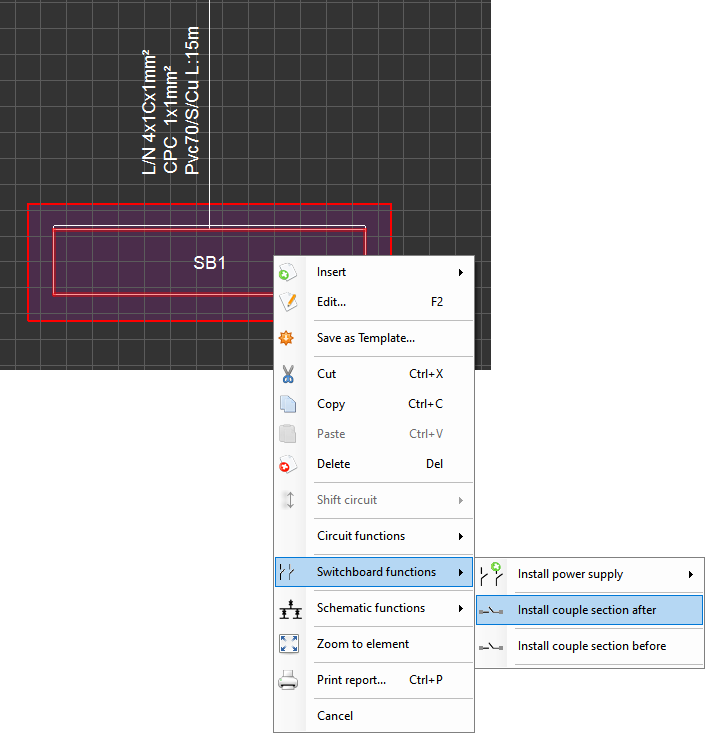
Once one of the Install couple section options is selected, ElectricaOM will place the coupler section next to the selected switchboard and places a switch in between. A coupler section will act similar to a switchboard component and will accept connections to other supplies.
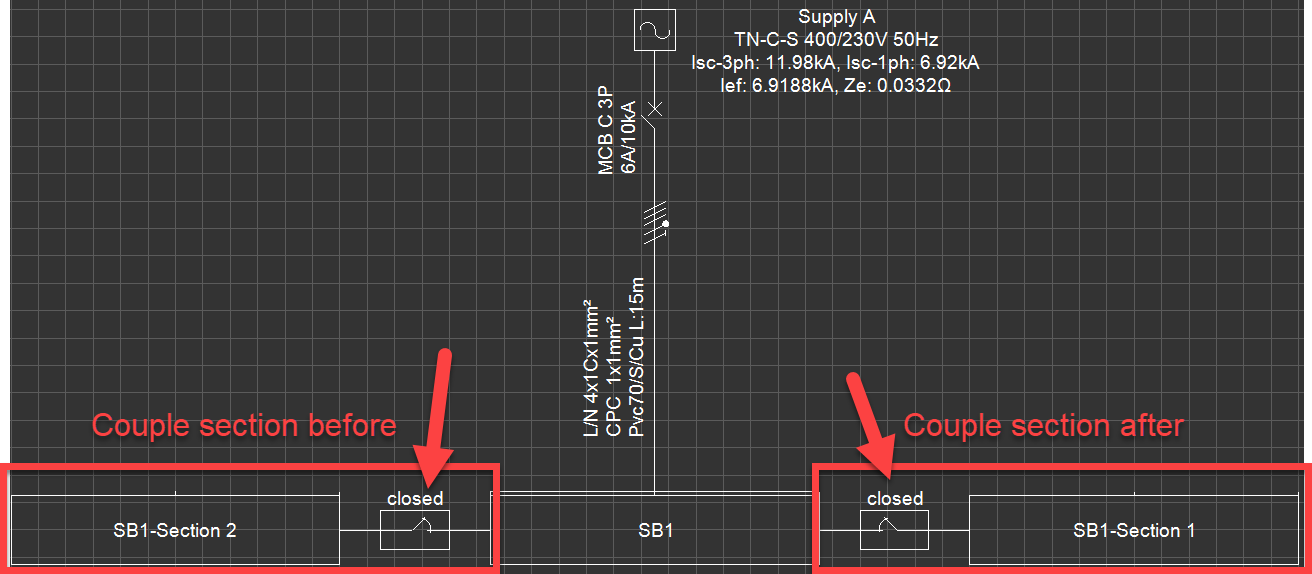
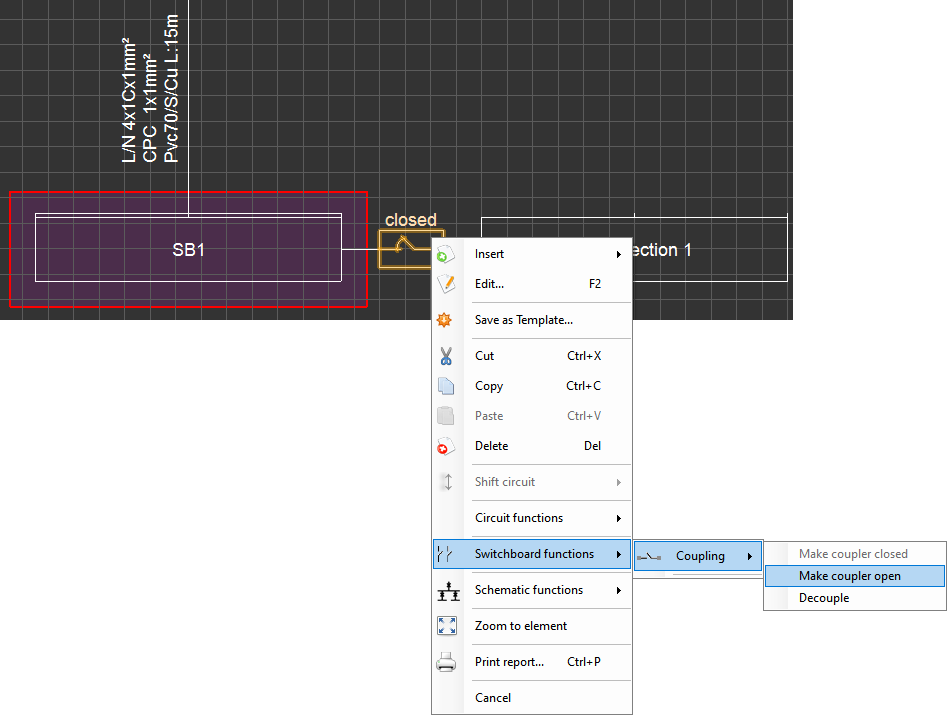
The switch can be opened or closed either by double clicking on it and selecting OK or using the Switchboard functions menu and selecting Make coupler closed or Make coupler open

Once a switch is opened, some parts of the system will be deactivated depending on the active source. Coupling sections can be extended following the same procedure described above and ElectricalOM will add switches between each section automatically.

Decoupling is also possible by means of the Decouple option so the coupling between the SB and the coupling section is removed.
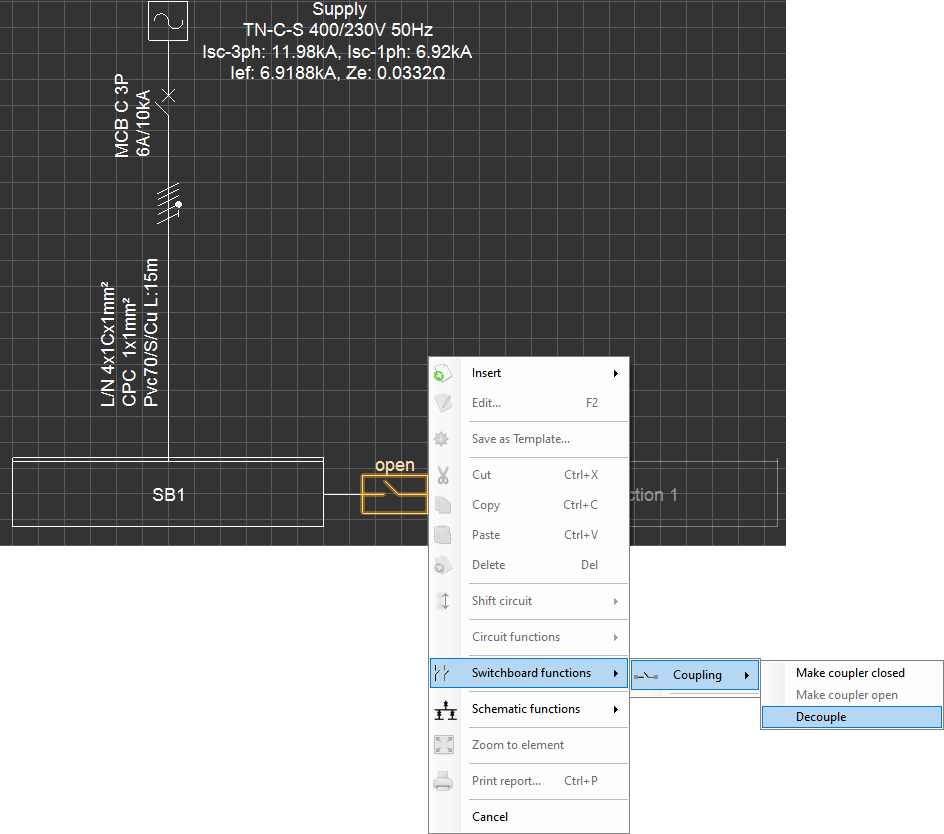
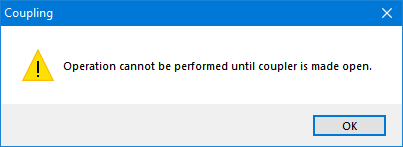
This action requires an open switch and if the user selects a closed switch to decouple ElectricalOM will warn the user to set the switch to open position first.
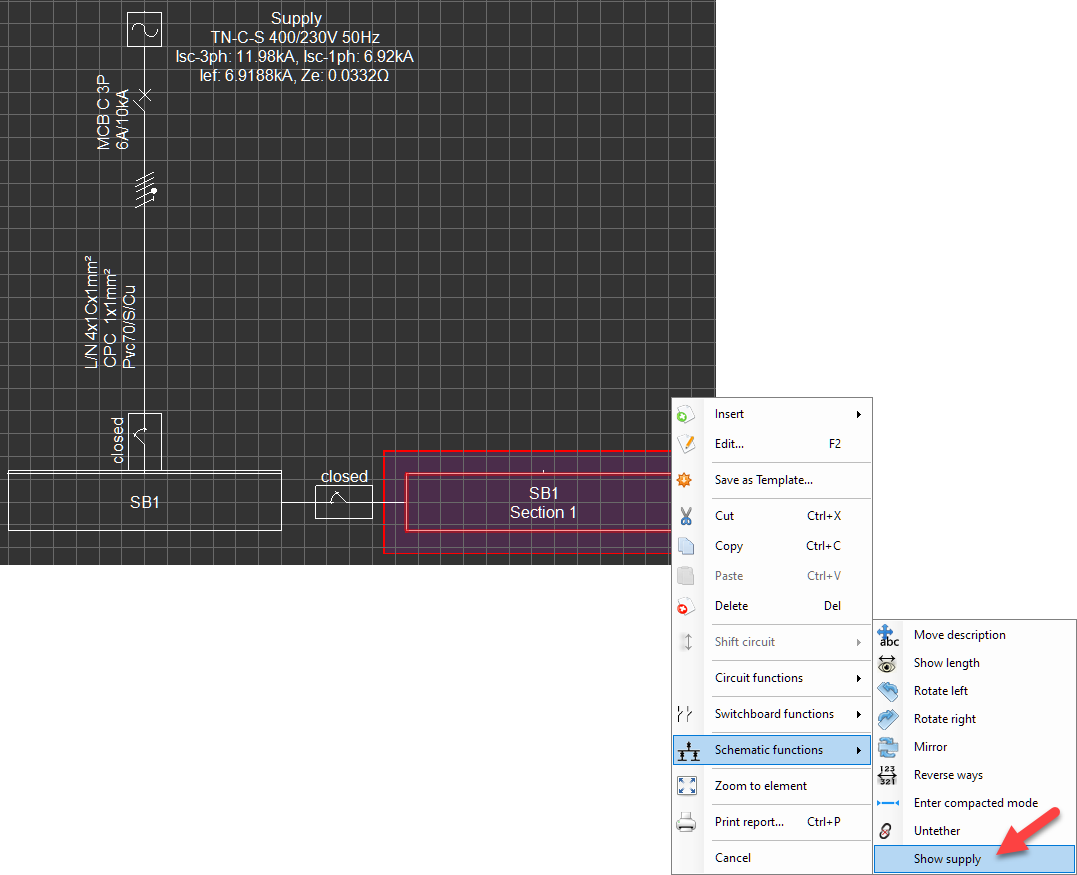
Once a coupling section is decoupled, it acts as a switchboard, and it might look like it is missing a source, however, this is not entirely true. As mentioned earlier, ElectricalOM requires a supply to be connected to any component, so when a coupling section is added, ElectrcialOM creates this section with a source which is hidden and inactive. If the user selects the coupling section, right-clicks on the coupling section and clicks on Show supply option, then this source will be visible.
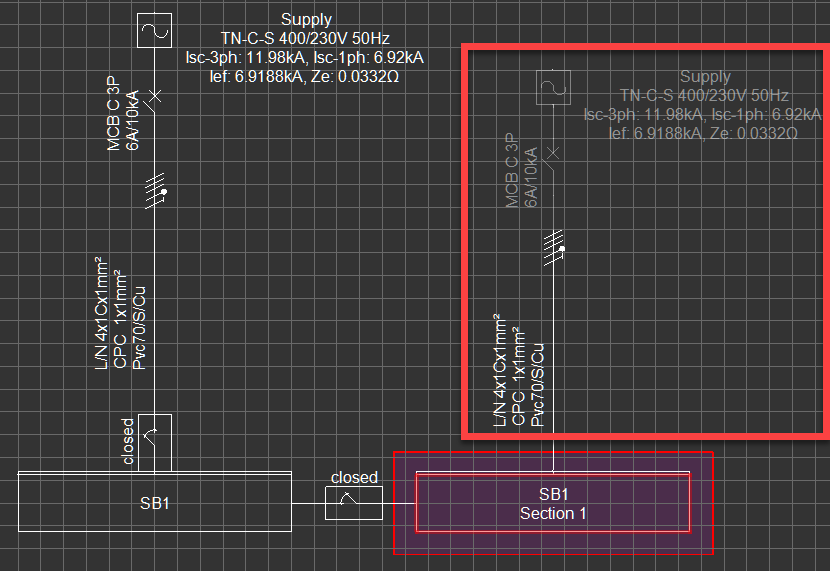
When decoupled, this supply will be the used for the decoupled section.