Export and Print Settings
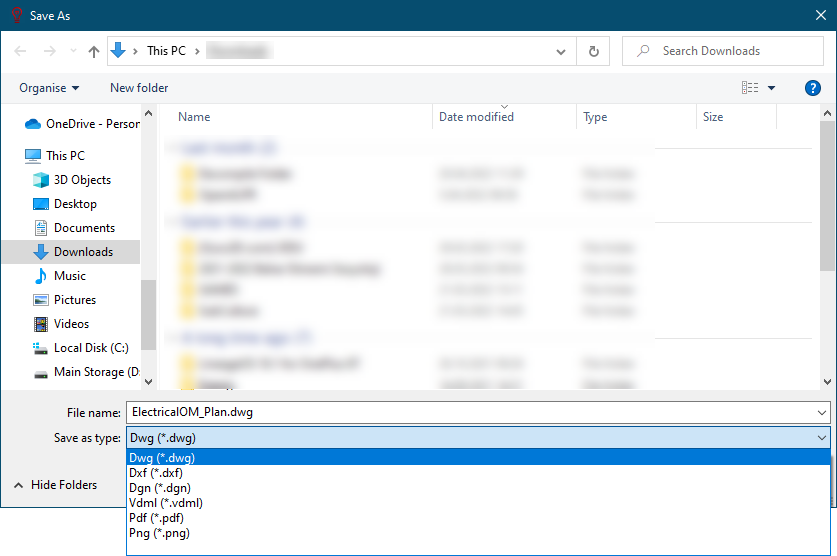
- Export drawing: This will initiate the Save As dialogue window where the user can select a location and a file extension for the exported file. Export drawing will export what is shown at the drawing area of CAD Plan Design and nothing else. So, before exporting, user must select the appropriate layer from the Pages tab.
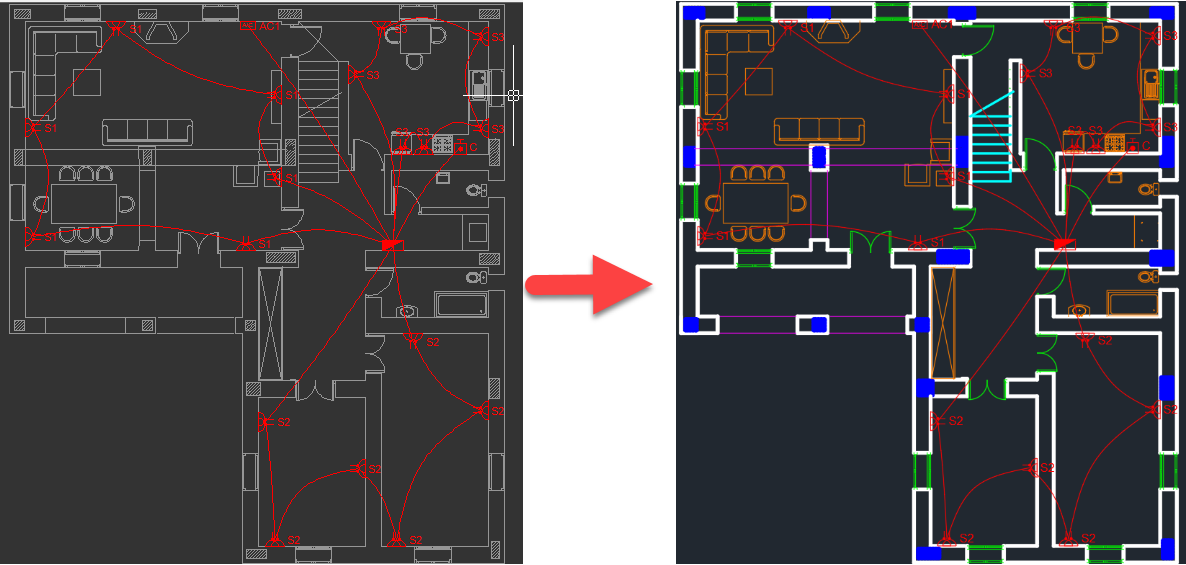
While exporting the drawing, original layer data, if applicable, will be maintained. As an example, the original layer colours, line weights, etc. are kept as seen on the right hand side below.
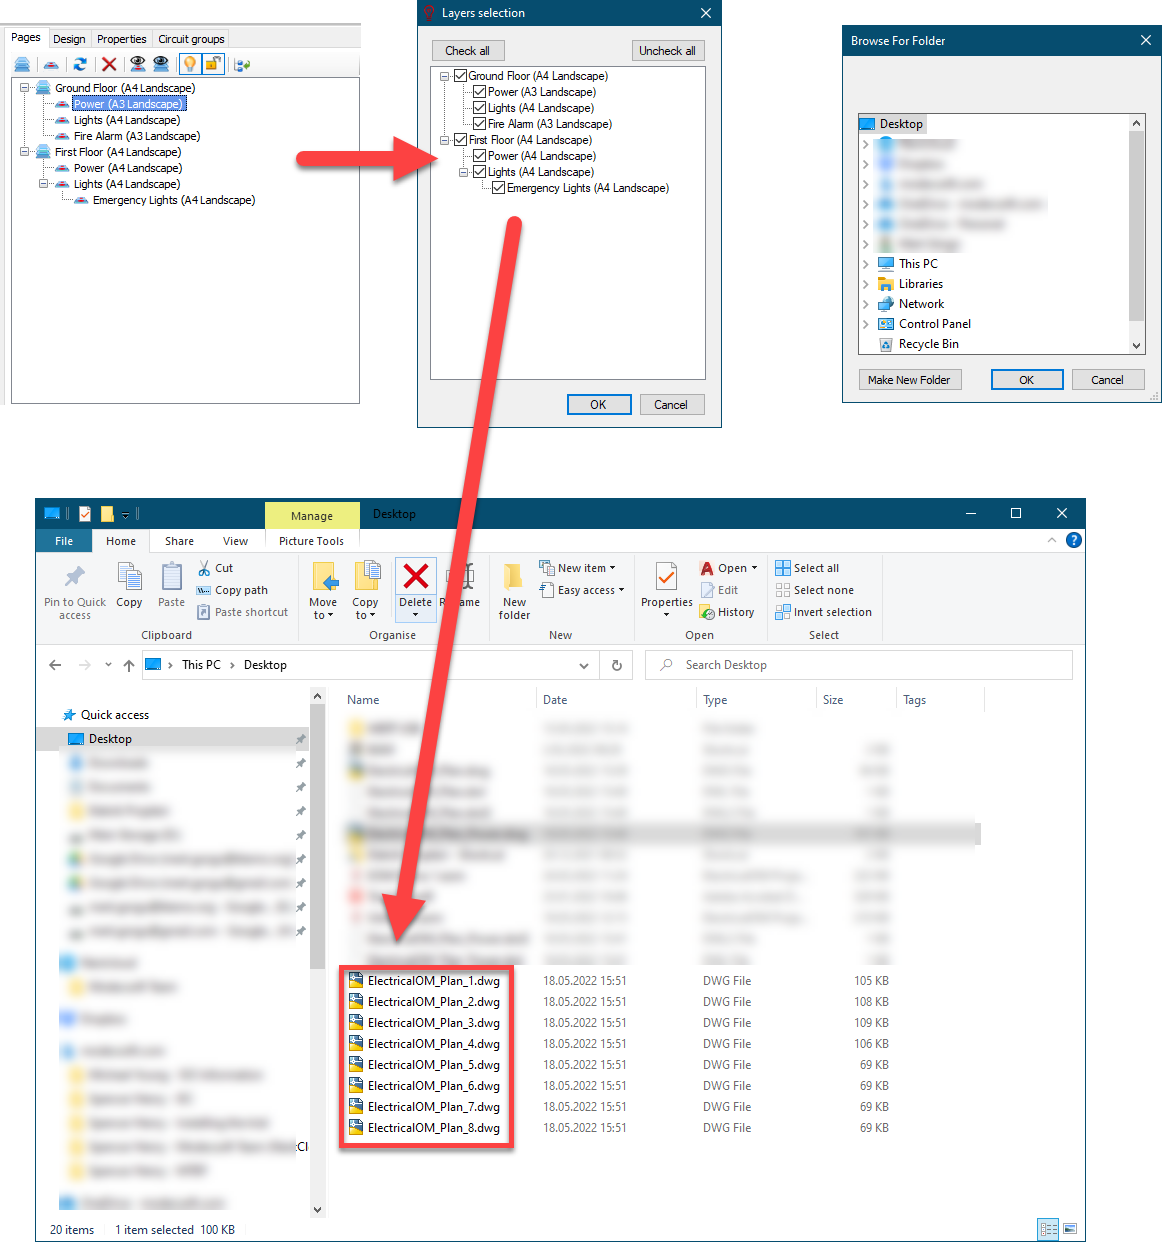
- Export selected: Sİmilar to Export drawing, this option will also export CAD Plan Design drawings, however, this option will let the user choose layers using tick boxes. Once the required layers and location for output files are selected, CAD Plan Design will export each layer as a separate .dwg file. Exporting will consider CAD Plan Design module's layer visibility settings.
- Print page: This button will open up a print preview window with the current visual at the drawing area of CAD Plan Design module.
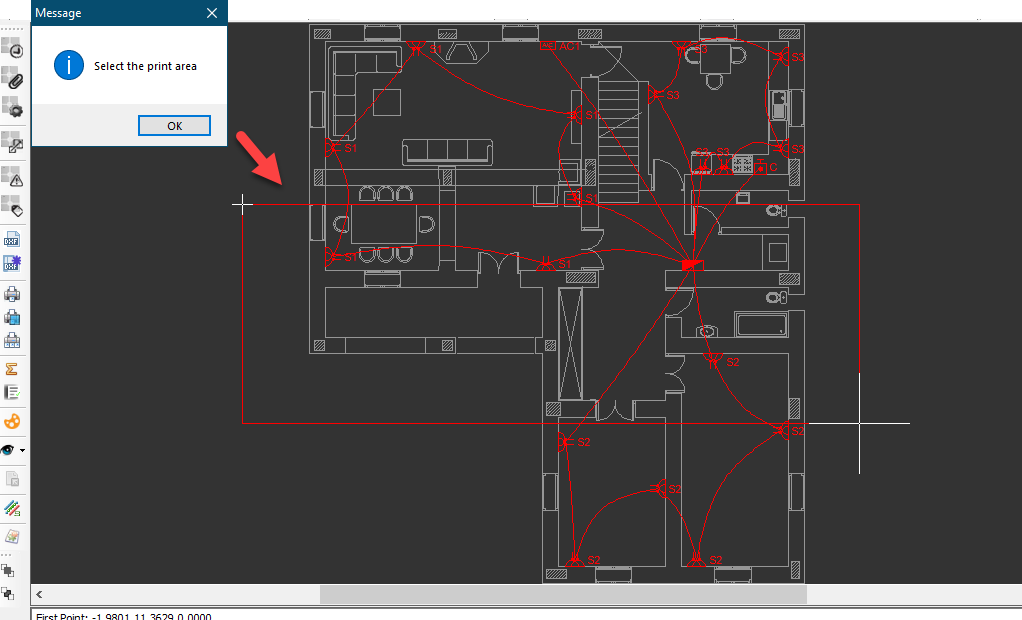
- Print page window: This button will display a Message window and expect the user to draw a rectangle which indicates the print area. After the rectangle is defined, the same print preview windows will appear.
- Print with settings: This button will display print options where the user may set various print options.
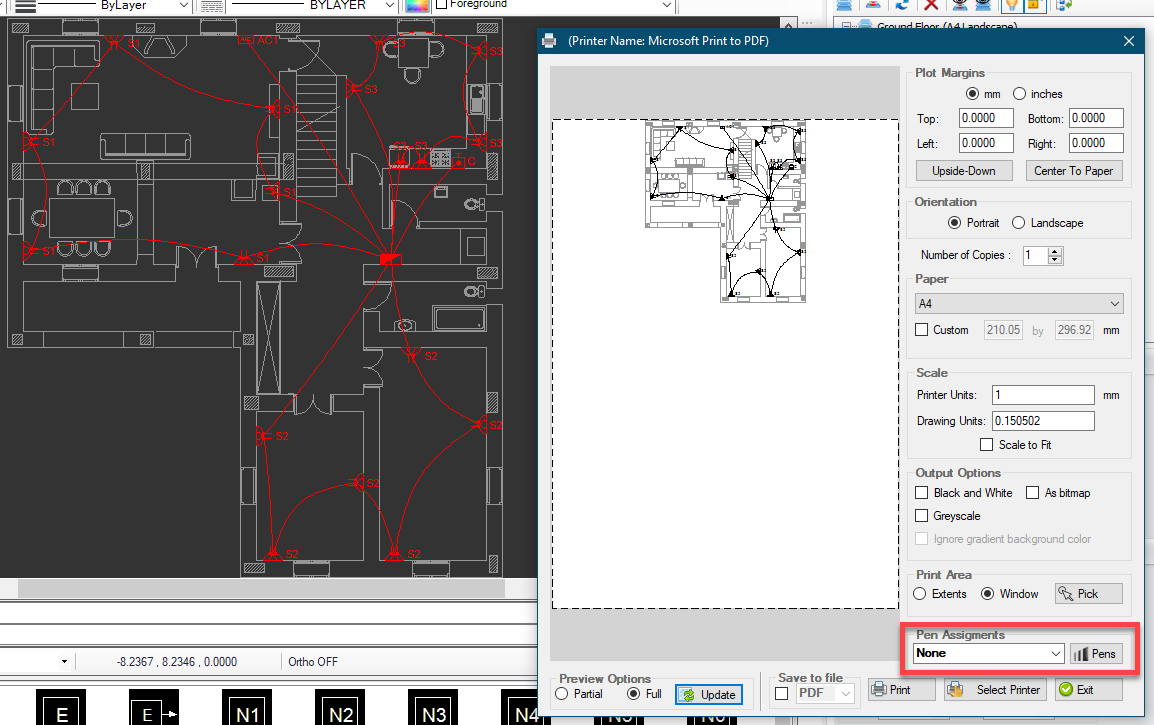
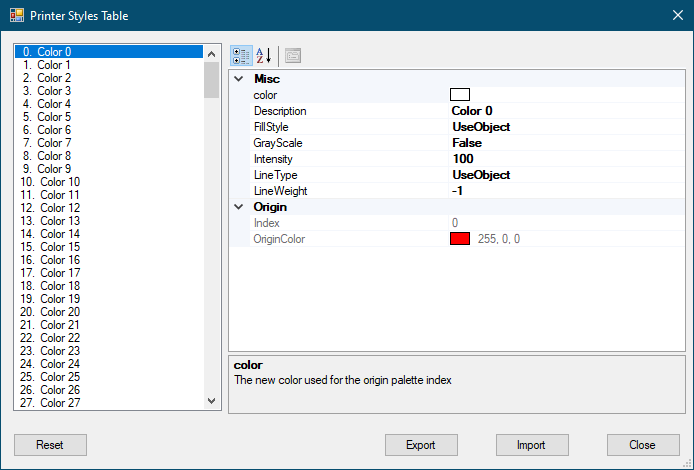
Print options window also lets the user to define custom pen settling. Once Pens button is clicked, CAD Plan Design will display the Printer Style Table window where settings related with each colour can be modified. Reset button will revert all the settings back to their original state.